この記事では、バックグラウンド、フォアグラウンドの判定方法を紹介します。
実装方法
実装方法は、以下の2パターンあります。
- SceneDelegate.swiftを利用する方法
- NotificationCenterを利用する方法
1. SceneDelegate.swiftを利用する方法
こちらはもうすでに判定はされています。
プロジェクト作成時に自動的に追加される、SceneDelegate.swiftを見てみてください。
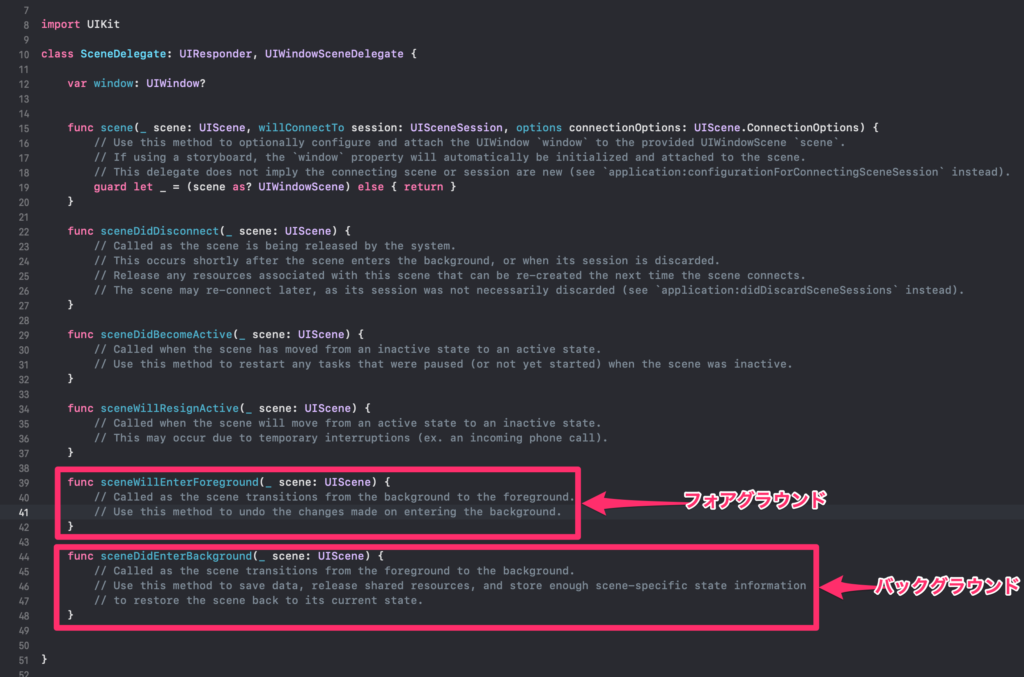
そのため、以下のように、記述すると判定が取得できます。
func sceneWillEnterForeground(_ scene: UIScene) {
    // Called as the scene transitions from the background to the foreground.
    // Use this method to undo the changes made on entering the background.
    print("フォアグラウンド")
}

func sceneDidEnterBackground(_ scene: UIScene) {
    // Called as the scene transitions from the foreground to the background.
    // Use this method to save data, release shared resources, and store enough scene-specific state information
    // to restore the scene back to its current state.
    print("バックグラウンド")
}
シミュレーターで実行してホーム画面に戻ると、コンソールにバックグラウンドと表示されるかと思います。またアプリを開くとフォグラウンドと表示されるはずです。
ただ、この方法では、ViewController内で判定が取得できないのでちょっと使いにくいです。
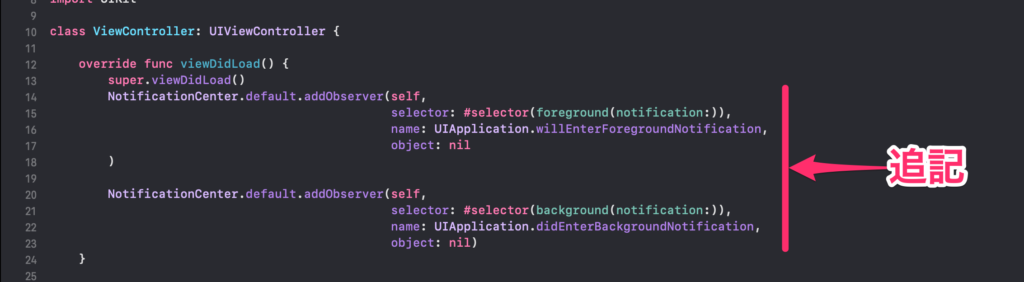
2. NotificationCenterを利用する方法
こちらの方法は、よく使われています。
まずは、NotificationCenterを使って受信する通知を登録します。ViewController.swiftのViewDidLoad()に以下のコードを追加してください。
NotificationCenter.default.addObserver(self,
                                       selector: #selector(foreground(notification:)),
                                       name: UIApplication.willEnterForegroundNotification,
                                       object: nil
)

NotificationCenter.default.addObserver(self,
                                       selector: #selector(background(notification:)),
                                       name: UIApplication.didEnterBackgroundNotification,
                                       object: nil
)
次に、通知を受信した時に行う処理を以下のように書きます。
@objc func foreground(notification: Notification) {
    print("フォアグラウンド")
}

@objc func background(notification: Notification) {
    print("バックグラウンド")
}
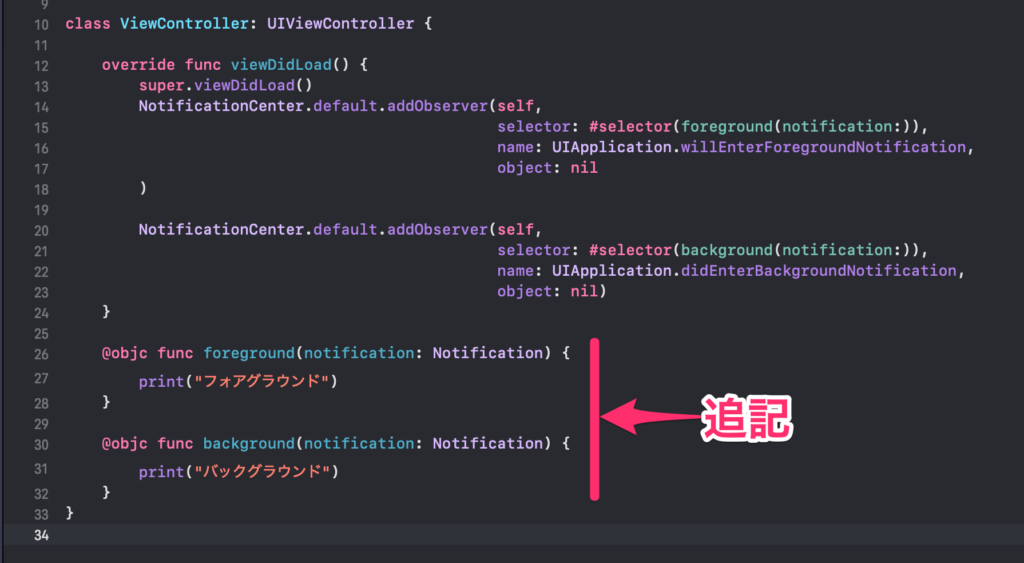
これで、ViewControllerでフォアグラウンド、バックグラウンドの処理が判定できたかと思います。
参考文献