
この記事では、SwiftUIでListを作る方法について徹底解説していきたいと思います。ListはUIkitで言うUITableViewのことですね。
Contents
Listの実装方法
簡単なリスト
struct ContentView: View {
var body: some View {
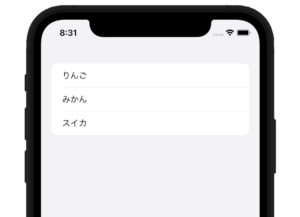
List {
Text("りんご")
Text("みかん")
Text("スイカ")
}
}
}
このように、Listの中にTextを並べるだけで、実装できてしまいます。Storyboardを使っていた僕からすると衝撃です。。Textはいくらでも増やせます。
画像とテキスト
struct ContentView: View {
var body: some View {
List {
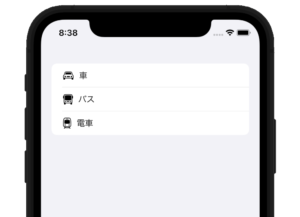
HStack {
Image(systemName: "car")
Text("車")
}
HStack {
Image(systemName: "bus")
Text("バス")
}
HStack {
Image(systemName: "tram")
Text("電車")
}
}
}
}
このように、HStackと組み合わせると、画像と文字を表示させることができます。
セクション(グループ)
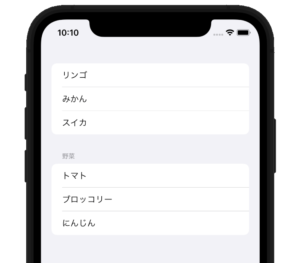
グループ化されたリストのことですね。
struct ContentView: View {
    var body: some View {
        List {
            Section {
                Text("リンゴ")
                Text("みかん")
                Text("スイカ")
            }
            Section(header: Text("野菜")) {
                Text("トマト")
                Text("ブロッコリー")
                Text("にんじん")
            }
        }
    }
}
このように、Listの中をさらにSectionで囲うとグループにまとめられます。セクションにはheader: で、タイトルをつけることもできます。
ちなみに、headerは、以下のような書き方もできます。
Section {
    Text("リンゴ")
    Text("みかん")
    Text("スイカ")
} header: {
    Text("フルーツ")
}
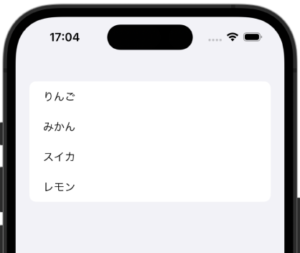
配列をリストにする
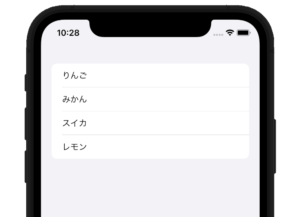
配列をリストに入れるにはForEachを使います。
struct ContentView: View {
    let fruits = ["りんご", "みかん", "スイカ", "レモン"]

    var body: some View {
        List {
            ForEach(0 ..< fruits.count) { index in
                Text(fruits[index])
            }
        }
    }
}
ちなみに、イレギュラーですが、ForEachを使わなくてもリストを作ることができます。
struct ContentView: View {
    let fruits = ["りんご", "みかん", "スイカ", "レモン"]
    var body: some View {
        List(fruits, id: \.self) { fruit in
            Text(fruit)
        }
    }
}
Structの配列をリストにする
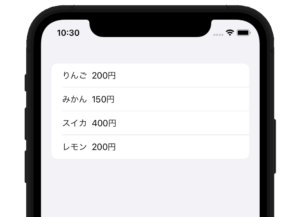
Structの配列を使う場合は、このように書きます。一つのセルに複数の情報を入れる場合は、こちらの実装の方が良さそうですね。
struct Fruits: Identifiable {
    var id: Int
    var name: String
    let price: Int
}

struct ContentView: View {
    let fruitsList = [
        Fruits(id: 0, name: "りんご", price: 200),
        Fruits(id: 1, name: "みかん", price: 150),
        Fruits(id: 2, name: "スイカ", price: 400),
        Fruits(id: 3, name: "レモン", price: 200)
    ]

    var body: some View {
        List(fruitsList) { fruitsList in
            HStack {
                Text(fruitsList.name)
                Text("\(fruitsList.price)円")
            }
        }
    }
}
セルのタップ判定
struct ContentView: View {
    var body: some View {
        List {
            Text("りんご")
                .onTapGesture {
                    print("りんごがタップされた。")
                }
            Text("みかん")
            Text("スイカ")
        }
    }
}
そのセルに、.onTapGestureをつけることでタップ判定を取得することができます。これで、「りんご」をタップすればprint文が実行されます。
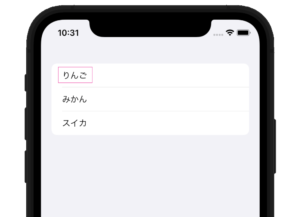
ただ、これだと、タップ領域が文字のところ(ピンクで囲ったところ)しかありません。
そのため、以下のように記述すると、タップ領域がセル全体になります。これだとセルのどこをタップしてもprint文が実行されます。
struct ContentView: View {
    var body: some View {
        List {
            HStack {
                Text("りんご")
                Spacer()
            }
            .contentShape(Rectangle())
            .onTapGesture {
                print("りんごがタップされた。")
            }
            Text("みかん")
            Text("スイカ")
        }
    }
}
タップ時に画面遷移
セルをタップしたときに、画面遷移させるという場面が多いと思いますが、以下のコードで簡単に実装できます。
struct ContentView: View {
    let fruits = ["りんご", "みかん", "スイカ", "レモン"]

    var body: some View {
        NavigationView {
            List {
                ForEach(0 ..< fruits.count) { index in
                    NavigationLink(destination: Text(fruits[index])) {
                        Text(fruits[index])
                    }
                }
            }.navigationBarTitle("フルーツ")
        }
    }
}
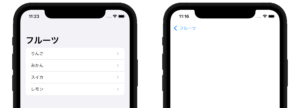
NavigationViewで全体を囲い、セルの内容をNavigationLinkで囲うと、これだけで画面遷移ができちゃいます。あと、セルの左側にシェブロンマーク(>)が付きます。
ちなみに、NavigationLinkを使わずに、このシェブロンマークを表示させるには、以下のように書きます。普通に無理矢理というか、、、、画像をつけてるだけです。
struct ContentView: View {
    let fruits = ["りんご", "みかん", "スイカ", "レモン"]

    var body: some View {
        List {
            ForEach(0 ..< fruits.count) { index in
                HStack {
                    Text(fruits[index])
                    Image(systemName: "chevron.right")
                        .font(Font.system(size: 14, weight: .semibold))
                        .foregroundColor(.secondary)
                        .opacity(0.5)
                }
            }
        }
    }
}
スワイプアクション

スワイプのアクションは以下のように記述します。
struct ContentView: View {
    let fruits = ["りんご", "みかん", "スイカ", "レモン"]

    var body: some View {
        NavigationView {
            List {
                ForEach(0 ..< fruits.count) { index in
                    Text(fruits[index])
                        .swipeActions(edge: .trailing) {
                            Button(role: .destructive) {
                                // 処理
                            } label: {
                                Image(systemName: "trash.fill")
                            }
                        }
                        .swipeActions(edge: .leading) {
                            Button {
                                // 処理
                            } label: {
                                Image(systemName: "flag.fill")
                            }.tint(.orange)
                        }
                }
            }
        }
    }
}
.swipeActionsでスワイプアクションをつけることできます。
edge: は位置を決めることができて、.trailingが右で.leadingが左です。
label: {の中に、画像やテキストを入れます。その後に、.tint(.orange)で色を変えることができます。
こちらは、iOS15から使えるモディファイアとなっております。そのため、対象OSを14.0(デフォルト)にしているとエラーになります。対象OSを15.0にするか、if #available(iOS 15.0, *) {で囲わなければなりません。
リストの色を変更する
セルの色を変更する

struct ContentView: View {
    var body: some View {
        List {
            Text("りんご")
                .listRowBackground(Color.red)
            Text("みかん")
                .listRowBackground(Color.blue)
            Text("スイカ")
                .listRowBackground(Color.green)
        }
    }
}
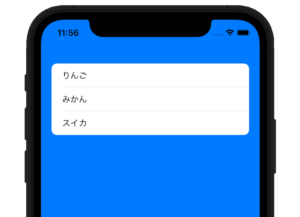
背景色を変更する
struct ContentView: View {
    var body: some View {
        List {
            Text("りんご")
            Text("みかん")
            Text("スイカ")
        }
        .scrollContentBackground(.hidden)
        .background(Color.blue)
    }
}
この方法は、iOS16で使えるようになりました。
ちなみに、iOS16以前では、以下のような指定をしていました。
struct ContentView: View {
    var body: some View {
        List {
            Text("りんご")
            Text("みかん")
            Text("スイカ")
        }
        .onAppear {
            UITableView.appearance().backgroundColor = UIColor.blue
        }
    }
}
SwiftUIでは、背景色を変更できないので、UIKitを使って変更させています。
リストの表示を変更する
リストの線を削除する
struct ContentView: View {
    let fruits = ["りんご", "みかん", "スイカ", "レモン"]

    var body: some View {
        List {
            ForEach(0 ..< fruits.count, id: \.self) { index in
                Text(fruits[index])
            }
            .listRowSeparator(.hidden)
        }
    }
}
リストのスタイルを変更する
リストにはいくつかのスタイルがあります。上記のリストは全てiOS14以降のデフォルトのスタイルになっています。
以下のコードのように、.listStyle(DefaultListStyle())というふうにスタイルを決められるのですが、何も書かない場合・DefaultListStyle()を指定した場合は、OSのバージョンによってスタイルが決められます。
struct ContentView: View {
    var body: some View {
        List {
            Text("りんご")
            Text("みかん")
            Text("スイカ")
        }
        .listStyle(DefaultListStyle())
    }
}
PlainListStyle()
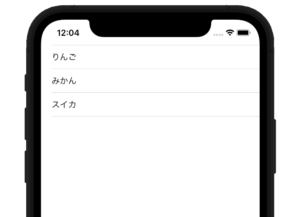
これは、ちょっと前のリストのスタイルですね。iOS13までこのリストでした。
.listStyle(PlainListStyle())
GroupedListStyle()
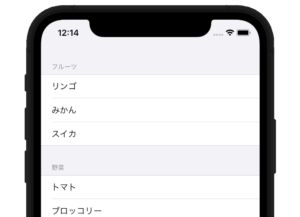
こちらは、背景色(セル部分以外)がグレーになるスタイルですね。
.listStyle(GroupedListStyle())
InsetListStyle()
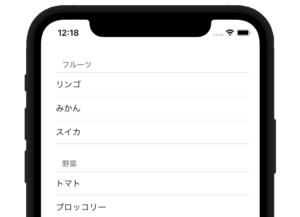
こちらは、左右に余白ができるスタイルになります。iOS14で追加されました。
.listStyle(InsetListStyle())
InsetGroupedListStyle()
こちらは、iOS14以降のデフォルトスタイルですね。
.listStyle(InsetGroupedListStyle())
SidebarListStyle()
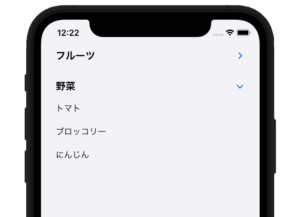
こちらは、右側のボタンを押すとリストが表示非表示の切り替えができます。iOS14で追加されました。
.listStyle(SidebarListStyle())
最後にまとめると、以下のスタイルがあります。
| スタイル | 使用可能OS | 説明 |
|---|---|---|
| DefaultListStyle() | – | OSにあったスタイルが適応される |
| PlainListStyle() | – | iOS14以前のデフォルトスタイル。非常にシンプル |
| GroupedListStyle() | – | セル以外グレー色になる。 |
| InsetListStyle() | iOS14〜 | 左右に余白ができる。背景色は白。 |
| InsetGroupedListStyle() | iOS14〜 | iOS14以降のデフォルトのスタイル。 |
| SidebarListStyle() | iOS14〜 | セクションごとに表示非表示ができるスタイル。 |
参考文献