
カスタムセルとは?
簡単に言うとセルだけのファイルを作って、それをテーブルに載せる。というのがカスタムセルです。
少し複雑なセルを作るときは、このカスタムセルを使いましょう。
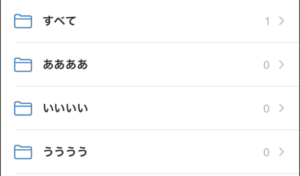
例えば、このように画像とかあるセルはカスタムセルで作った方がいいと思います。
動作環境
| Item | Version |
|---|---|
| Swift | 5.4 |
| Xcode | 12.5 |
| Interface | Storyboard |
実装の仕方を簡単に解説
①TableViewを配置して紐付ける
②「subclass」をUITableViewCellにして、「Also create XIB file」にチェックを入れて、セルだけのクラスとボードを作成
③ViewDidLoadに以下のコードを記述
tableView.register(UINib(nibName: "MainTableViewCell", bundle: nil), forCellReuseIdentifier: "customCell")
※MainTableViewCellはTableCellクラスの名前
④func tableViewのUITableViewCellに以下のコードを記述
let cell = tableView.dequeueReusableCell(withIdentifier: "customCell", for: indexPath) as! MainTableViewCell
※MainTableViewCellはTableCellクラスの名前
カスタムセルの実装方法
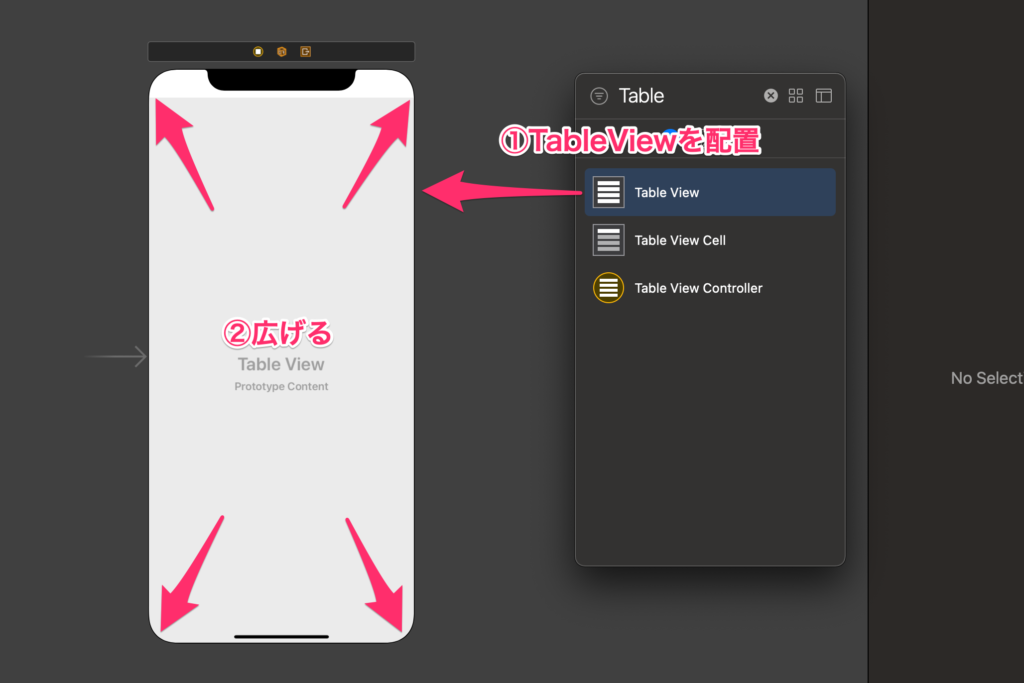
①TableViewを配置
②TableViewを広げる
dataSourceとdelegateを紐付けます。
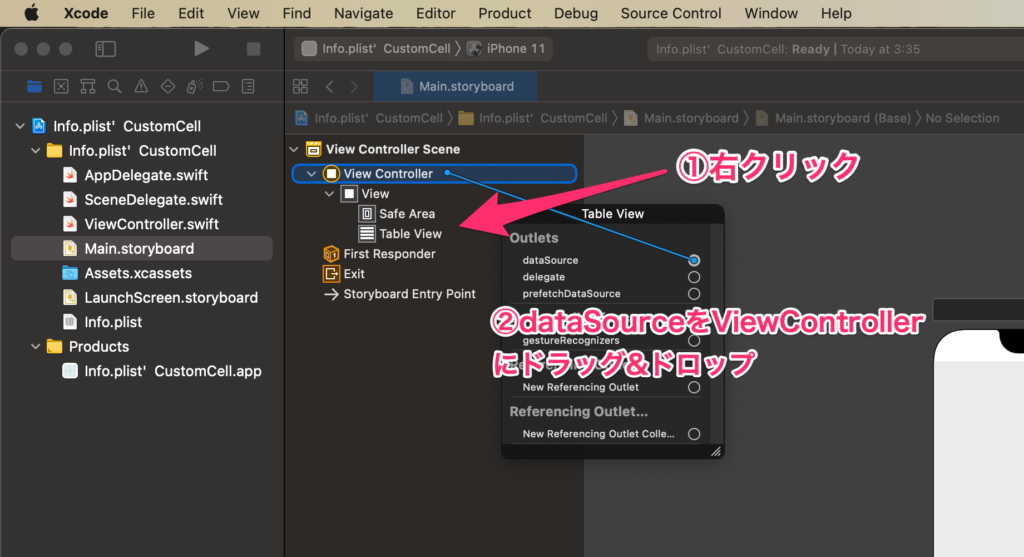
①TableViewで右クリック
②dataSourceの○(丸)をView Contollerにドラッグ&ドロップ

同じようにdelegateもドラッグ&ドロップしてください。
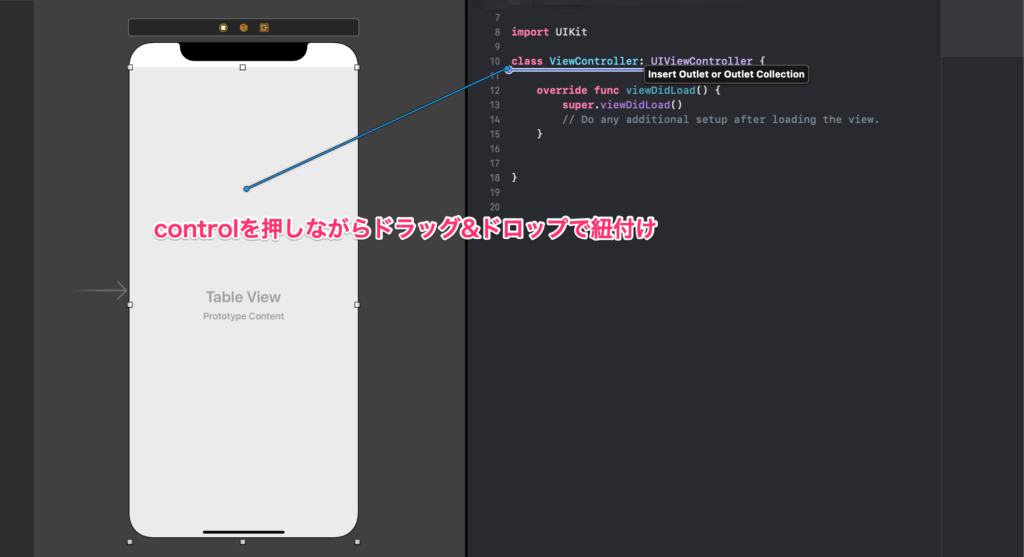
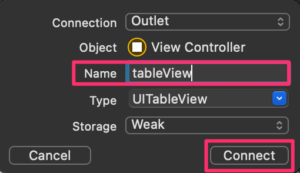
TableViewをtableViewという名前で紐付けます。
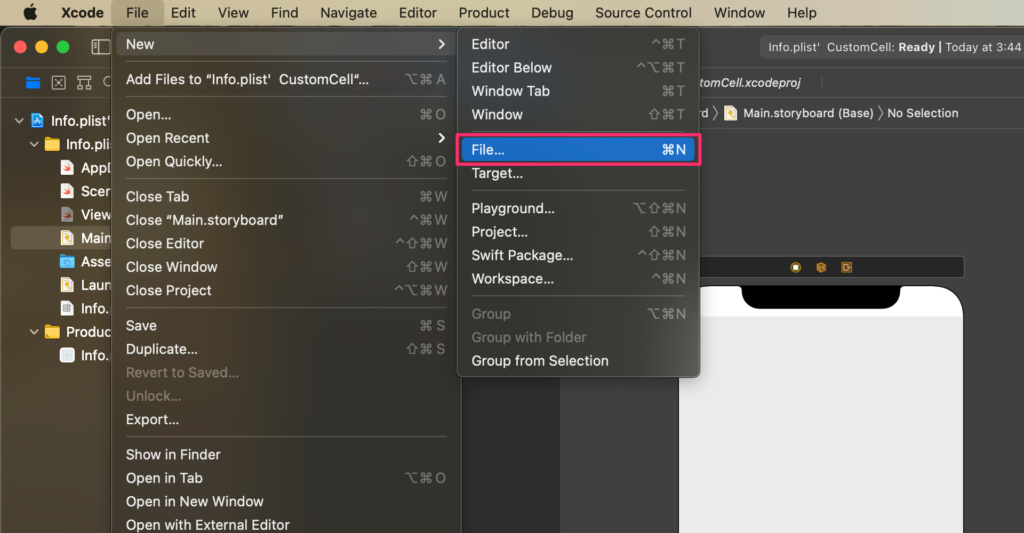
メニューバーのFile > New > File…をクリックしてください。
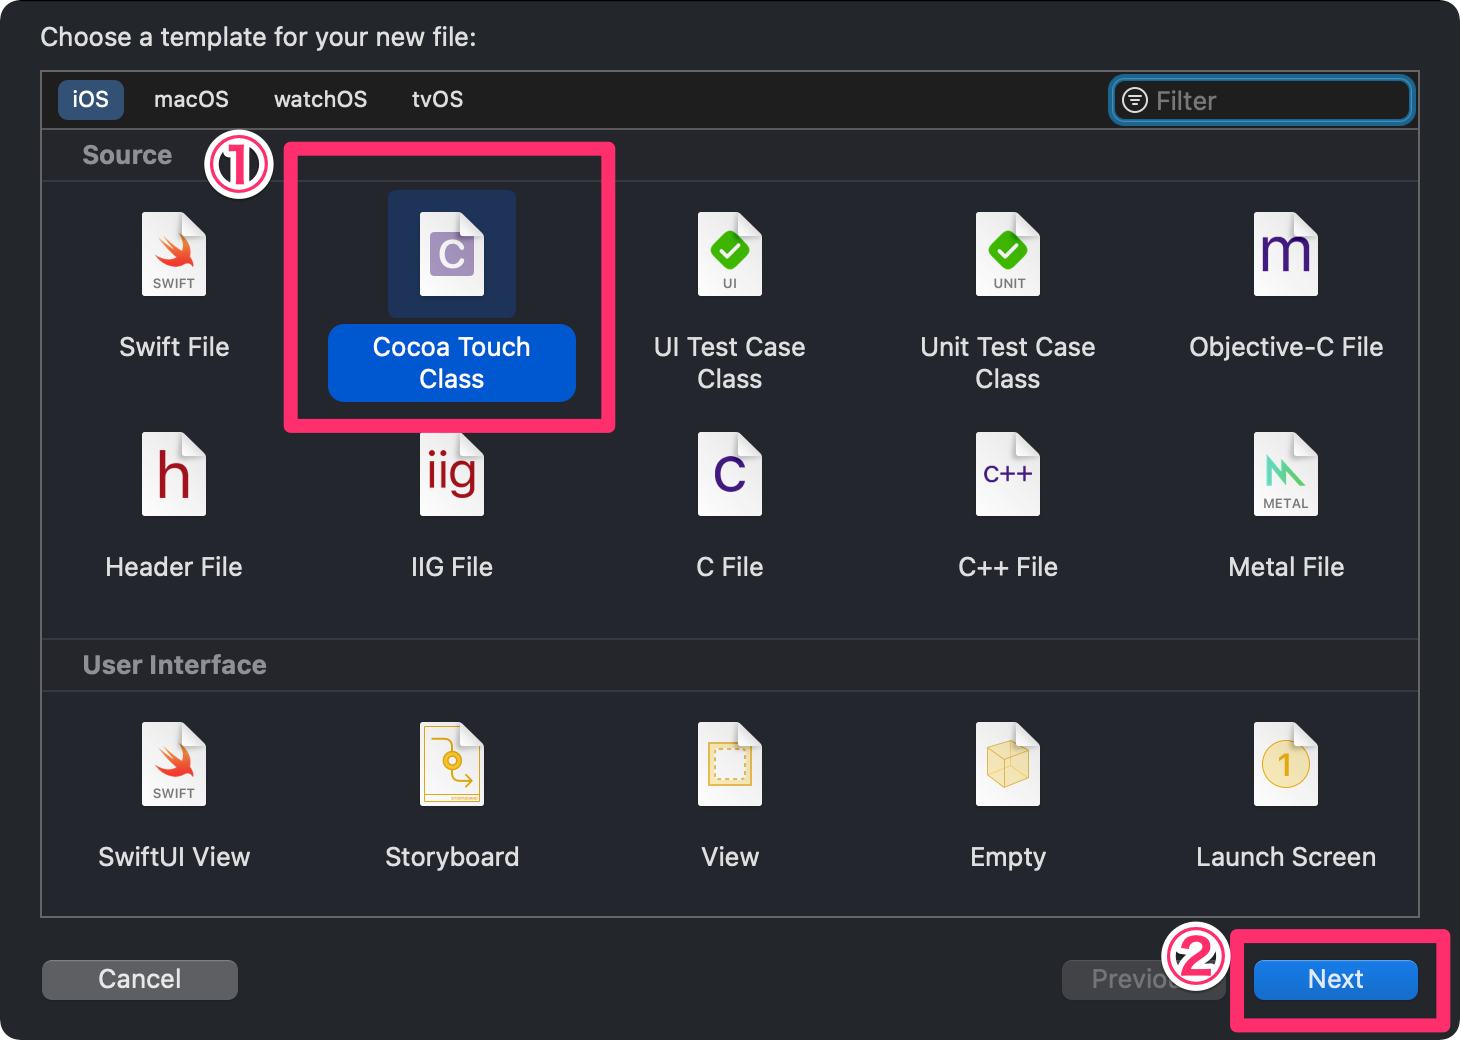
①「Cocoa Touch Class」を選択
②「Next」をクリック
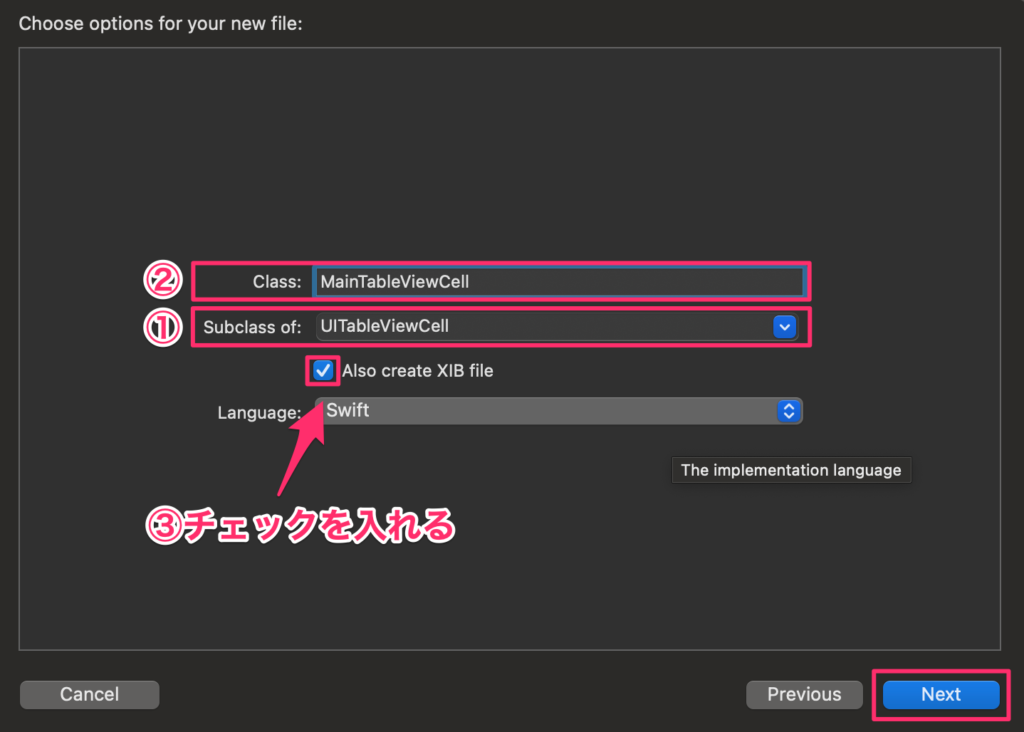
①「Subclass of:」を「UITableViewCell」に変更
②「Class」にMainTableViewCellと入力
③「Also create XIB file」に必ずチェックを入れて、「Next」をクリック
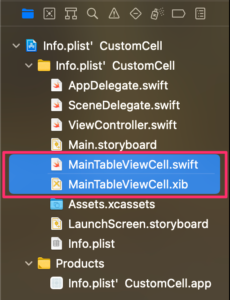
そうすると、このようにMainTableViewCell.swiftとMainTableViewCell.xibが作られます。
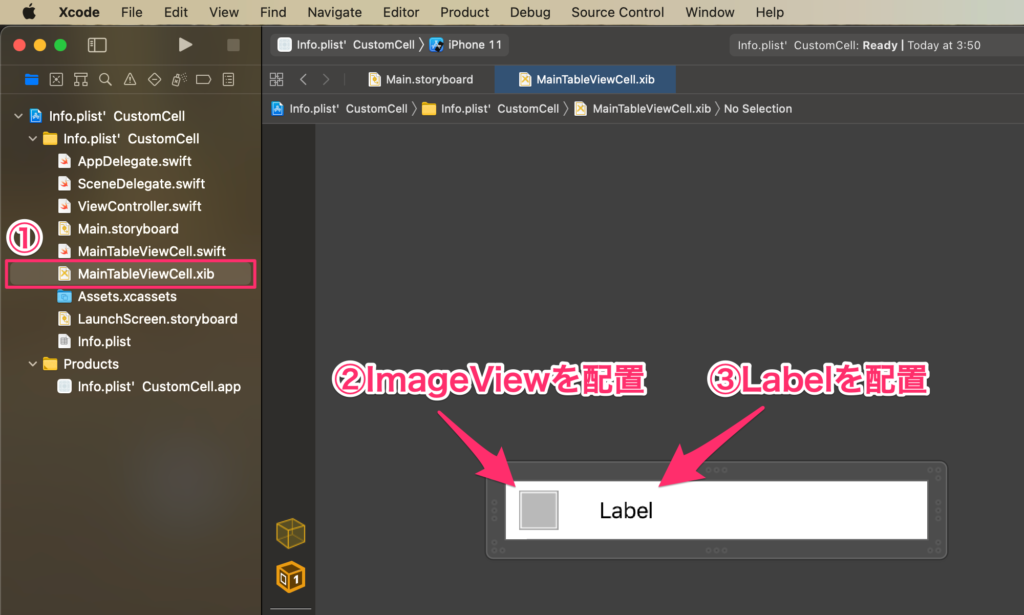
①MainTableViewCell.xibを選択
②ImageViewを配置
③Labelを配置
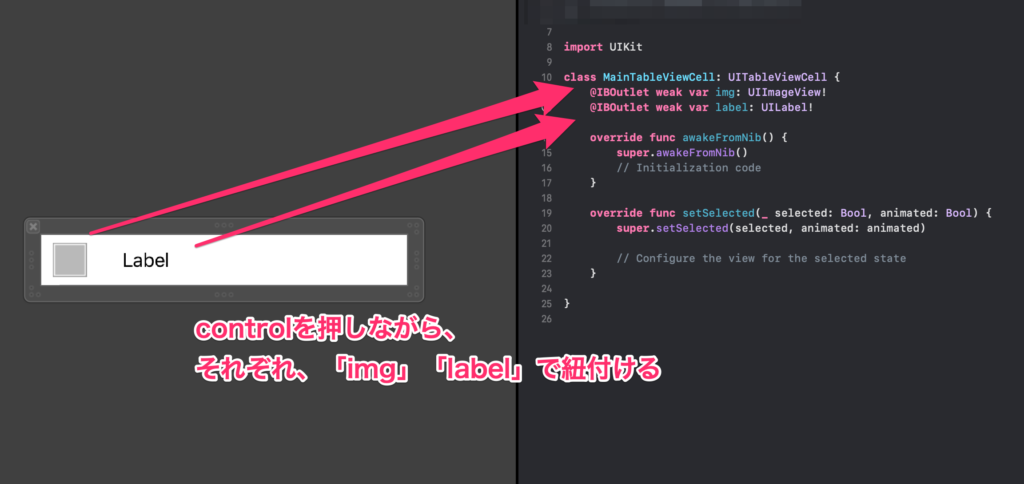
command + option + control + enterで2分割する
Imageをimgという名前で、Labelをlabelという名前で紐付ける
①class ViewController: UIView~~を以下のように記述
class ViewController: UIViewController, UITableViewDelegate, UITableViewDataSource {

※この時点では、エラーが起きてしまいます。
以下の手順で、エラーを自動で解消できます。
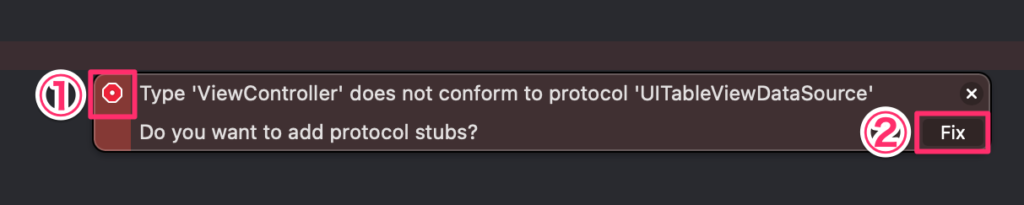
①○(赤い丸ボタン)をクリック
②Fixをクリック
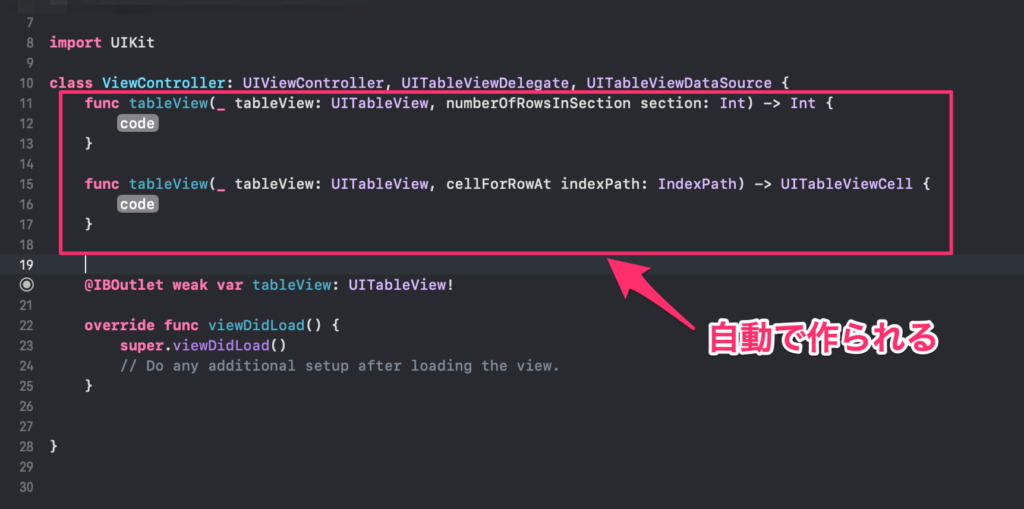
↑Fixを押すことで、自動的に適当なコードが作られ、エラーが解決できます。
しかし、@IBOutletやoverride funcの上にあるのは不自然なので、以下のようにコピペで下に移動させましょう。

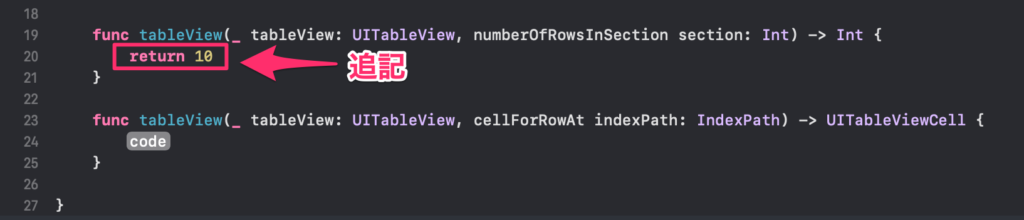
セルの数を設定するために、1つ目のfunc tableView~~を以下のように追記
func tableView(_ tableView: UITableView, numberOfRowsInSection section: Int) -> Int {
        return 10
    }
セルを登録するために、override func viewDidLoadを以下のように追記
override func viewDidLoad() {
        super.viewDidLoad()
        // Do any additional setup after loading the view.
        tableView.register(UINib(nibName: "MainTableViewCell", bundle: nil), forCellReuseIdentifier: "customCell")
    }

このコードでMainTableViewCellを登録してるイメージです。
セルを表示させるために、2つ目のfunc tableView~~を以下のように追記
func tableView(_ tableView: UITableView, cellForRowAt indexPath: IndexPath) -> UITableViewCell {
        let cell = tableView.dequeueReusableCell(withIdentifier: "customCell", for: indexPath) as! MainTableViewCell
        return cell
    }

先程の2つ目のfunc tableView~~を以下のように追記
cell.img.image = UIImage(systemName: "swift")
cell.label.text = "Swift"

cell.img.image = UIImage(systemName: "swift")で、ImageViewにSwiftのアイコンを表示させています。
cell.label.text = "Swift"で、LabelにSwiftという文字を表示させています。
command + rで実行
![]()
このようになるはずです!
これでカスタムセル(CustomCell)を使ったテーブルビュー(TableView)が完成しました!
ViewController.swiftではなく、MainTableViewCell.swiftに書いても同じように表示させることができます。
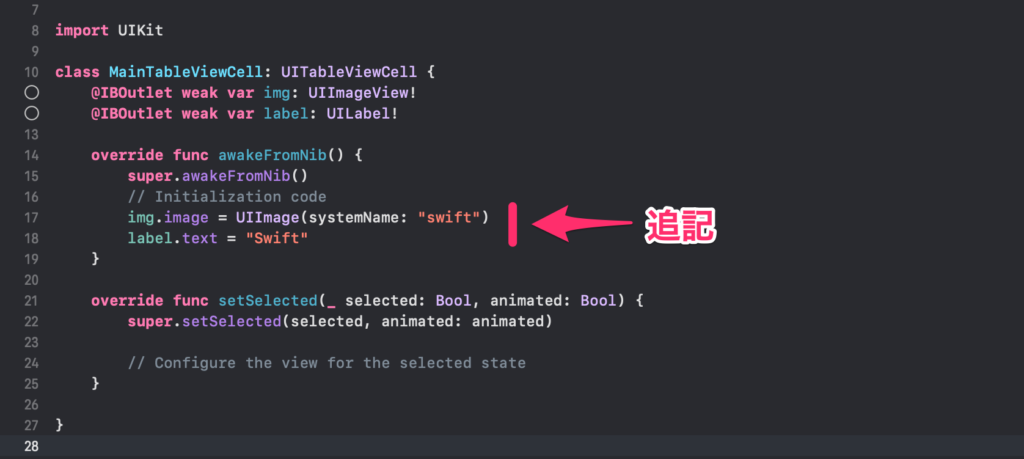
MainTableViewCell.swiftのawakeFromNib()を以下のように追記
override func awakeFromNib() {
        super.awakeFromNib()
        // Initialization code
        img.image = UIImage(systemName: "swift")
        label.text = "Swift"
    }
これで実行してみても同じ結果になるはずです!
ViewController.swiftに書いてしまうと、ViewController.swiftのコードが長くなって読みづらくなってしまいます。
なので、なるべくMainTableViewCell.swiftに書いた方がいいと思います。
完成
ViewController.swift
import UIKit

class ViewController: UIViewController, UITableViewDelegate, UITableViewDataSource {

    @IBOutlet weak var tableView: UITableView!

    override func viewDidLoad() {
        super.viewDidLoad()
        // Do any additional setup after loading the view.
        tableView.register(UINib(nibName: "MainTableViewCell", bundle: nil), forCellReuseIdentifier: "customCell")
    }

    func tableView(_ tableView: UITableView, numberOfRowsInSection section: Int) -> Int {
        return 10
    }

    func tableView(_ tableView: UITableView, cellForRowAt indexPath: IndexPath) -> UITableViewCell {
        let cell = tableView.dequeueReusableCell(withIdentifier: "customCell", for: indexPath) as! MainTableViewCell
        return cell
    }

}
MainTableViewCell.swift
import UIKit

class MainTableViewCell: UITableViewCell {
    @IBOutlet weak var img: UIImageView!
    @IBOutlet weak var label: UILabel!

    override func awakeFromNib() {
        super.awakeFromNib()
        // Initialization code
        img.image = UIImage(systemName: "swift")
        label.text = "Swift"
    }

    override func setSelected(_ selected: Bool, animated: Bool) {
        super.setSelected(selected, animated: animated)

        // Configure the view for the selected state
    }

}